
How to Find the Best Smart Thermostat for Your Home
By Megan Treacy


Table of contents
Best smart thermostat for mini-splits
Best smart thermostat for baseboard or radiant heat
Are smart thermostats worth the money?
Installing a smart thermostat is one of the easiest ways to save money and energy. But choosing the best option — for example, a Nest vs. Ecobee or a Flair vs. Sensibo — can get complicated. In this article we’ll help you find the best smart thermostat for your home.
But first, let’s talk briefly about how much money, energy, and carbon emissions you can save by switching to a smart thermostat.
According to Energy Star, heating and cooling accounts for almost 50% of a home’s energy use at an average cost of $900 a year. Their studies have shown that smart thermostats can save people an average of $100 on their home energy bills a year.
For most smart thermostats, that means a return on investment in only one or two years, making it one of the most affordable energy saving upgrades you can make.
Smart thermostats are also a great way to cut your carbon footprint. According to a recent analysis we did, the average homeowner can cut their carbon footprint by 0.8 tons per year by making a switch. And if everyone in America switched to a smart thermostat we could reduce our country’s emissions by 22 million tons per year.
So what’s the best smart thermostat for your home?
We evaluated the top selling brands and models and looked at price, installation difficulty, compatibility, and product design to make our picks. Here’s what we found:
Best smart thermostat
Since the first smart thermostats began hitting the market over a decade ago, the offerings have gotten more and more sophisticated. What was once a few trailblazing models is now a crowded marketplace.
Out of the latest crop of smart thermostats, there are two that stand out in features, ease of use, and customer happiness: Ecobee’s Smart Thermostat with Voice Control and the Google Nest Learning Thermostat.
It was impossible to pick one over the other. They’re the same price, compatible with most home HVAC systems, and both feature smart software that makes saving energy a breeze.
Both models offer easy installation, sleek design and intuitive interfaces, and they both have multiple options for upgrading your experience with add-on sensors and the ability to work with multiple smart home systems.
Which one is best for you depends on your preference when it comes to their differences. Below is our evaluation of the Ecobee vs. Nest Learning Thermostat.
Ecobee Smart Thermostat with Voice Control Review

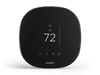
Bottom line: The best choice for those who want extra customization and control.
Price: $250
Pros:
- Built-in Alexa speaker that not only allows you to use voice control to change the temperature, but play music and control other smart home systems like lights.
- The best remote sensors on the market. It comes with one, but you can add up to 32 that measure room temperature and detect when a room is occupied. The system makes sure the rooms being used are at comfortable temperatures.
- Compatible with other major smart home systems like Apple HomeKit, Google Assistant, IFTTT, and SmartThings.
- Geofencing that detects when your phone is at home or away and automatically adjusts the temperature.
- eco+ mode that lets you set a preferred energy savings level and adjusts your heating and cooling to times of the day when prices are lower.
- Better compatibility and customization with 2-stage heat pumps.
Cons:
- Ecobee has a Schedule Assistant which makes suggestions to match your routine with the optimal settings, but it doesn’t make adjustments on its own like the Nest.
- Geofencing only works with Android and only one phone per household can be linked, which could be a problem for families or if you have roommates.
- It’s more expensive than options with less features like Nest’s low priced smart thermostat.
- Not compatible with mini-split heating and cooling systems or baseboard heaters.
Google Nest Learning Thermostat Review
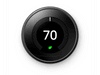
Bottom line: The best choice for those who want the software to do the work for them.
Price: $250
Pros:
- The best feature of the Nest Learning Thermostat has been and continues to be the learning software. Use it like a regular thermostat for a week and it will learn your routine and temperature preferences when you’re home and switch to energy efficient temperatures when you’re away. Unless you want to make changes, it programs itself.
- Compatible with many smart home systems like Google Assistant, Amazon Alexa, IFTTT, and SmartThings.
- Geofencing that detects when your phone is at home or away and automatically adjusts the temperature. Multiple phones and accounts can be connected.
- Works with Nest Temperature Sensors (sold separately) that let you program specific temperatures for certain rooms.
- Motion detector built into the unit to detect when you’re home or away.
Cons:
- Not compatible with Apple HomeKit.
- No remote sensors included. You can only connect up to six Nest Temperature Sensors, but they don’t detect occupancy like Ecobee’s.
- It’s more expensive than options with less features like Nest’s low priced smart thermostat.
- Not compatible with mini-split heating and cooling systems or baseboard heaters.
Best budget smart thermostat
If you don’t want to shell out $250 for a smart thermostat, consider the Nest’s base model, which is $130 and only lacks one major feature (compatibility with the remote sensors).
This is a great option if your home is the same temperature in every room.
Nest Thermostat Review

Price: $129
Pros:
- Connected app that lets you schedule your heating and cooling over a seven-day period and control the temperature remotely from anywhere.
- Geofencing that detects when your phone is at home or away and automatically adjusts the temperature.
- Compatible with Amazon Alexa and Google Assistant out of the box (and other smart home ecosystems like Apple HomeKit if you buy a smart home bridge).
- Easy to use interface.
Cons:
- It doesn’t have the ability to learn your schedule or connect with remote sensors for more precise climate control and motion detection.
- It’s made out of a cheaper plastic material than the Nest Learning thermostat.
- Not compatible with mini-split heating and cooling systems.
Best smart thermostat for mini-splits
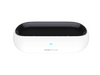
We evaluated the most popular mini-split smart thermostats on the market (the Flair Puck, Sensibo’s Sky and Air models, and Ambi’s Climate and Mini).
Our favorite option was the Flair Puck. It stood out for 3 reasons:
- It’s the only option that can be controlled directly from the hardware (as opposed to the app).
- Each Flair Puck comes with wall-mounting accessories.
- They offer the best customer service of any of the three companies we evaluated.
However, at $119 per controller, the Flair Puck is more expensive than the Sensibo Sky ($79) and Air ($99). That’s why the Sensibo Sky is our budget pick. If you want to save some money and don’t care about wall-mounting or controlling the temperature from the hardware, go with the Sensibo Sky.
If you want to connect to your Apple HomeKit, your only option today is the Sensibo Air.
While we liked the Ambi Climate Mini, we didn’t like the Ambi Climate 2. It’s the only option on the market that offers “learning” AI technology like the Nest. But at $149 per controller, we don’t think it’s worth the money.
For a more detailed look at each option, check out the pros and cons of each one below:
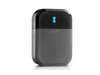
Flair Puck Review

Price: $119
Pros:
- You can control the temperature directly from the puck, which means you don’t have to get out your phone or app every time.
- Wall-mounting option. This is nice if you don’t want to clutter your bedside table or counter. Note: The Ambi Climate Mini also offers this feature.
- The best customer service of any of the companies we looked at.
- Compatible with most mini-splits. You can check if yours is compatible by looking at the remote. Fully compatible devices will display the set point temperature and fan speed.
- Compatible with Alexa and Google Home.
Cons:
- Expensive if you have multiple mini-splits. For example, if you have 4 mini-splits it’d cost $480 to connect all four to Pucks. Sensibo Sky’s on the other hand would cost $276 for the same set up.
- Not compatible with Apple HomeKit. The Sensibo Air is the only model we found that is.
- Unintuitive, hard to use mobile app. Though, every model out there has this problem. And Flair is the only option that lets you control the temperature without the app (i.e. directly from the hardware).
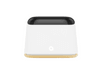
Sensibo Sky Review
Price: $79
Pros:
- Cheapest option on the market. If you need to control four mini-splits it’ll only cost you $276 compared to $480 for the Flair Puck and Ambi Climate Mini or $600 for the Ambi Climate 2.
- Compatible with most mini-splits on the market. The company claims that it will work with 10,000 models and anything that has a remote controller.
- Technically you can mount it on the wall. But this requires a third-party wall-mount.
- Compatible with Google Home, Alexa, and Apple Siri (though not HomeKit).
Cons:
- Unintuitive, hard to use app that you have to use if you want to change the temperature. With the Flair Puck you have the ability to control the temperature from the hardware or app.
- There are some complaints online about the company sending “vaguely spam-y looking emails” trying to upsell other products.
Sensibo Air Review
Price: $99
Pros:
- Cheaper than similar options from Ambi and Flair. This is especially good if you have a lot of mini-splits you want to control. Four Sensibo Air’s cost $356 compared to $480 for Flair Pucks and Ambi Climate Minis.
- The only model on the market that offers full Apple Home Kit compatibility. It is also compatible with Alexa and Google Home.
- Compatible with most mini-splits on the market. The company claims that it will work with 10,000 models and anything that has a remote controller.
Cons:
- You can’t mount the controller on the wall like the Flair Puck.
- Unintuitive, hard to use app that you have to use if you want to change the temperature. With the Flair Puck you have the ability to control the temperature from the hardware or app.
- There are some complaints online about the company sending “vaguely spam-y looking emails” trying to upsell other products.
Ambi Climate Mini Review
Price: $129
Pros:
- Cheaper than the Ambi Climate 2 by $130 per controller without losing many features. The only difference between the two is the Climate 2’s learning feature, which we didn’t find that compelling.
- Wall-mounting option. This is nice if you don’t want to clutter your bedside table or counter.
- Compatible with Alexa and Google Home.
Cons:
- Not compatible with Apple HomeKit. The Sensibo Air is the only model we found that is.
- Expensive if you have multiple mini-splits. For example, if you have 4 mini-splits it’d cost $480 to connect all four to Pucks. Sensibo Sky’s on the other hand would cost $276 for the same set up.
Ambi Climate 2 Review
Price: $149
Pros:
- It learns your patterns and behavior to predict when to turn on or off your mini-split. As of writing this is the only mini-split controller that does this.
- Compatible with most mini-splits on the market. You can check if yours is compatible here.
- Compatible with Alexa and Google Home.
Cons:
- Most expensive option on the market. At $250 per controller, it’d cost $1,000 to connect four mini-splits. The Sensibo Sky would cost $276 for comparison.
- Not compatible with Apple HomeKit. The Sensibo Air is the only model we found that is.
Best smart thermostat for baseboard or radiant heat
There are limited options for homes with high voltage heaters, but our pick ticks all of the boxes you’d want in a smart thermostat.
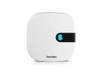
Mysa Smart Thermostat Review
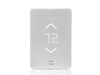
Price: $139 for electric baseboard heaters, $199 for electric in-floor heaters
Pros:
- App allows you to control in-home temperatures from anywhere and schedule temperature settings.
- Automatically sets home and away temperatures using geofencing.
- Compatible with most smart home systems including Amazon Alexa, Google Assistant, Apple HomeKit, and SmartThings.
- Good looking design.
- Eco mode software that helps you to save more energy with small temperature adjustments without sacrificing comfort.
Cons:
- Expensive if you need to put one in multiple rooms.
Best smart thermostat for home automation enthusiasts
Ecobee Smart Thermostat with Voice Control
See above for why this model is tied for the best you can buy, but let’s look at what makes it especially suited for your home automation setup.
- It comes with Alexa already built in, but it can work with the other major smart home ecosystems you may have in place, including Apple HomeKit. You can use voice control to make adjustments to any compatible smart devices in your home.
- Ecobee offers other smart devices that pair with it seamlessly like its remote room temperature sensors with motion detection, smart cameras and smart door and window sensors.
- When linked with other smart devices, you unlock more energy saving features. For example, if your window or door sensors detect that one or more have been open for five minutes, Ecobee will shut off your air conditioning to save energy.
What to look for when buying a smart thermostat
All of the models in this guide have great features that can help save energy and money, but there are a lot of factors that go into determining which model out there is the best for your home and needs.
When shopping for a smart thermostat you’ll want to consider the following:
C wire requirement
When you remove your old thermostat from the wall, you’ll see a few wires with different purposes within your HVAC system. One of those is likely the common wire, or C wire, which provides power to your thermostat.
Most newer HVAC systems have a C wire in place, but older systems may not.
Some smart thermostat models like those from Ecobee and Honeywell require a C wire for installation, while others like the Nest don’t. All brands recommend using one.
Don’t have a C wire? Here are your options:
- Use the included power extender kits that come with Ecobee and Honeywell thermostats to hardwire a solution yourself. This is more advanced than the basic installation and you’ll want to use video tutorials provided by the brand or one of the many you can find on YouTube to guide you.
- Have an electrician install a C wire for about $150. While a more expensive option, this will give you peace of mind that everything is set up correctly and safely.
- Go with a Nest thermostat, which can get the small amount of power it needs from its internal battery and another wire. Be aware that a few types of systems are not compatible with the Nest without use of a C wire. Use this handy compatibility checker before you buy.
Ease of installation
Unless you have a complex HVAC system, all of our recommended models should be easy to install in about 30 to 45 minutes. The devices come with clear instructions and the brands have video tutorials that take the guesswork out of it.
If your system has multiple components controlled by the thermostat like a dehumidifier or heat pump, you might want to let a professional handle the installation so you don’t do any damage.
In most cases, the installation will be simple and quick, but here are a couple tips to make it even easier:
- Take note of the wiring of your old thermostat before removing it so you know which wires go where. Taking a picture is even better.
- Make sure you know what type of HVAC system you have (gas, oil, electric, propane, forced air, radiant) because you’ll need that information during the set up.
Geofencing
Geofencing is a feature that creates a boundary around your home using the GPS on your phone and the smart thermostat’s app.
When you, or specifically your phone, are within that boundary, the thermostat keeps your settings at your preferred “at home” temperatures. When the app detects that you’ve left that boundary, it will adjust the temperature to be more energy efficient.
Geofencing is great for people who don’t have set schedules or who come and go a lot during the day. If you have a consistent home and away schedule and want to lean on the learning features of a smart thermostat, you may prefer to keep this feature deactivated unless you’re going out of town or otherwise breaking from your schedule.
Many models offer geofencing, but they differ in compatibility. Check to make sure that the smart thermostat you choose supports geofencing with your phone’s operating system. Some only allow one phone to be connected per household, while others allow multiple phones to be tied to the geofencing.
If multiple phones are connected, the thermostat would switch to your away settings only once the last phone left the boundary.
High-voltage heater support
If you have a central HVAC system, you basically have your pick of smart thermostats. Those with high voltage heaters like baseboard, radiant, or forced fan convectors will have to look for a model designed to work with those systems.
Most smart thermostats like the Ecobee and Nest are made to work with a low voltage system. Hooking them up to a high voltage system can be dangerous and the workarounds that exist can negate the energy savings you’re trying to achieve. Stick with one meant for your high voltage heater like the Mysa.
Sensors
While geofencing is an easy way to automate your home and away settings, sensors can give you more precise control.
Most brands have additional smart sensors that can be linked to your thermostat. Those sensors can be placed in the rooms where you need better climate control. If a room you spend a lot of time in tends to run hot or cool compared to the rest of the house, your system will run until that room is at the preferred temperature.
Prioritizing the temperature in certain rooms can be a way to keep your thermostat from wasting energy on regulating the temperature in rooms that aren’t used as often.
These sensors also detect motion so that the system will return to “at home” settings when someone is in those rooms, as opposed to relying on a connected phone for geofencing.
Many of the smart thermostat models have motion sensors in the unit itself for detecting when you’re home or away and some can also link to door or window sensors that are part of your smart home set up.
Smart home system integration
If you’re already a smart home enthusiast, you’ll want to make sure that the thermostat you choose is compatible with the smart home system you already use. The top of the line models work with many of the most popular systems like Amazon Echo, Google Home, IFTTT, Apple HomeKit and Samsung’s SmartThings, but there are exceptions like the Nest not working with Apple HomeKit, so double check.
If a smart thermostat is your first step into home automation, many of the brands have additional devices like smart cameras and window and door sensors to easily expand your setup if you wish.
User interface and design
A smart thermostat can have all of the best features, but if you can’t figure out how to use them, you’ll never benefit from them.
Our top picks not only look great on the wall with clear displays and sleek designs, but the controls are easy to read and intuitive to use. That goes for the connected apps as well.
A smart thermostat’s design should make it easy to utilize its energy saving features, not be a hindrance.
Rebates
While smart thermostats are inexpensive compared to say rooftop solar, $250 is nothing to sneeze at. The good news is that you may be able to cut a large chunk off the price with rebates.
Many of the models, including the ones we mentioned in this guide, are Energy Star certified. That means they’re eligible for rebates from utilities or government programs around the U.S.. The one exception is the Mysa, but only because Energy Star doesn’t have a category for that type of thermostat yet. Go here to see how much you can get back in your area.
Also, some utilities offer cash incentives if you sign up for their demand response program. That’s when you agree to let the utility raise (or lower) your thermostat a few degrees when demand is highest, such as during peak hours or on particularly hot days.
Where I live in Austin, Tex., people are eligible for a $25 rebate and $85 for signing up for demand response. That would take the price of our best thermostats from $250 down to $140, an amount that could be recouped in around a year.